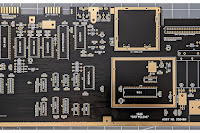
If you've read my entries here, here, here and here, you will be well aware that I have, of late, been spending some time building and experimenting with a "SixtyClone" Commodore 64, a modern reproduction of the famous 80's home computer.
Part of this whole undertaking was to see if this was possible with modern replacements for the original ICs (Integrated Circuits): the chips that make the whole thing tick.
In the final entry in that series, I came to the conclusion that, with my particular SixtyClone board, the 250466 variant, replacing the ICs was troublesome.
Since then, I've taken delivery of a few more replacement parts and it's worth noting down here what I've subsequently discovered. To save repeating myself, all tests were carried out by replacing one chip at a time, and with an ARMSID and PLAnkton in place. If, after installing the replacement, it booted correctly, I ran the following demos back-to-back to test:
- Christmas Mega Demo
- Eclectic
- Edge of Disgrace
- Star Wars
I also played:
- Commando
- Ghostbusters
- My own (never-to-be-published-so-don't-even-ask) game which is a good test of sprite collisions.
Replacement 1 - TOLB
The first replacement I want to talk about is the TOLB (sometimes called "The Other Little Board" and which represents the number 8701 upside down). This is a substitute for the original 8701 chip and was developed by François Léveillé, aka Eslapion.
This was an easy replacement. Out came the original chip, in went the TOLB and it just worked. No glitches, no repeat of the strange sprite collision behaviour I encountered with DIYChris's 8701 replacement (which itself is based on a design by Jeff Birt). All demos and games displayed and behaved normally.
Cost: £10.99 + £3.35 Shipping =£14.34 from Retroleum
Replacement 2 - SaRuMan SRAM
Cost: £12.99 + £2.12 Shipping = £15.11 from Retroleum.
Another replacement developed by François Léveillé. This was very interesting. For the first test I removed the TOLB and put back the original 8701 chip. Then removed original RAM and inserted the SaRuMan.
Oh dear. Back to the strange character issue that initially plagued me when I tested another type of replacement RAM. Much research revealed that other replacement utilised SRAM that was rated at 12ns, much too fast for this old computer. The SaRuMan however was rated at a more tolerable 55ns so I did not believe this error was the same and at no stage did it replicate the "constant restore" issue I encountered. And indeed, I had partially expected this, again, from information gleaned while (obsessively?) scouring forums, and in this case, a comment by Mario Bernardo (aka SX64 Man) under this YouTube video:
" ... I also had the same exact issue with the Saruman and 6567R8 VICs in 250466 NTSC and PAL boards only. The Saruman however works fine with the 6567R9 or 6569R5... If I recall correctly, the exact "weird character" issue you saw in the video with the Saruman is due to some of the different RAS timings on some of the earlier C64 board revisions and earlier VICs. "
If this was correct, replacing my 6569R3 VIC with a 6569R5 (which I was planning to do anyway) would cure this issue.
This segues very nicely to:
Replacement 3 - 6569R5
From Poly.play.com
Like the TOLB, this replacement was easy. It just worked. It did not however, make any improvement what-so-ever to jail-bars or smearing and so picture quality remains acceptable but far from perfect.
With this in place however, it was time to test the SaRuMan.
It freakin worked!
Yup, with the 6569R5 VIC-II the SaRuMan behaved exactly the same as normal RAM. No weird characters, no odd behaviour at all. Obviously I was delighted but without an oscilloscope I could not confirm why. I got in touch with the developer, François Léveillé who has very kindly replied and advised:
"It looks like the CPU clock coming from the 6569R3 is 'offset' relative to the AEC signal and this causes the R/W signal, when low (CPU performing a write) to stay low for a brief period INTO the VIC-II access portion of the cycle.
The C64C (250469) is protected from this problem because the DRAM R/W signal is passed through the large 64 pin PLA."
All Replacements Together
With the original chips removed and the SaRuMan, TOLB and now the 6569R5 in place, the C64 works perfectly. All demos and games played with no issues and as far as I can tell the computer is behaving exactly as one would expect. Happy days.
So what have I learned so far about modern replacements in my SixtyClone 250466?
- 12ns SRAM does not work.
- The Jeff Birt 8701 replacement, and derivatives, are incompatible with something, as yet unknown.
- My 6569R3 VIC-II does not work with SaRuMan.
- SaRuMan will work with 6569R5 VIC-II.
- TOLB works.
- ARMSID works.
- PLAnkton works (but note: as of June 2024 these have been discontinued.)
- RECOM replacement 5V and 12V voltage regulators work.
- I am shit out-of-luck if I want all black replacement parts.
 |
| My working build. Shame about all the green. |
What's Next?
 |


