Please note, since writing this article in April '23 the Ultimate II+ L has had several firmware updates which radically enhance the functionality of the device. I will write a new article to reflect these enhancements soon.
Introduction
My pi1541 was always a temporary stopgap. When I started getting into the Commodore 64 (after a 30 year hiatus) I really wanted an Ultimate II+ (developed by Gideon Zweijtzer) but couldn't really justify the price in case my interest was merely passing. By the time I figured I really needed one, they couldn't be had for love nor money... Actually, that's not quite true: they could be had at scalpers prices on auction sites but they could not be had new. The chip shortage which has plagued pretty much every electronics project since the pandemic had rendered the Ultimate II+ unobtanium. So my pi1541 was a perfect temporary solution (and thank god I got that before the pi Zero became impossible to get too!)
In order to combat this Gideon had to redesign his hardware, to incorporate components which were available, and which were of a price the masses could eventually afford. All this takes time. It was back in April 2022 that Gideon was winding up the redesign and started taking pre-orders again. That's when I got my pre-order in. It wasn't until March 2023 however, that I finally took delivery of mine. I have no complaints at all about the wait. I have some idea of the enormous scale of the task Gideon had to undertake to complete this and I know he's moved mountains to get it done.
The result, the Ultimate II+ L (herefter U2+L), is impressive and whilst I'm not going to cover all the features here I will go into some depth on the features I use the most, and how they enhance the use of my Commodore 64.
The Hardware
First, let's take a tour:
As you can see, on the outside there's not actually all that much to it, with just 3 buttons to control; 3 full size USB ports (one of which, the blue one, is for connecting to the cassette port with a separate adapter and not, as it would appear, a USB3 connector); an IEC port; 1 micro USB power port; audio in and line level out ports and a network port: it's a compact and neat design which hides a serious amount of grunt. I love the injection moulded case too.
To connect I simply plug in the supplied IEC cable to the port illustrated above and to the corresponding port on the Commodore 64, then slid it into the cartridge connector. I've no need for the cassette adapter, hence I didn't buy one.
Preparing a USB Drive
Before switching on you will want to prepare a USB drive with your software on it. The drive should be formatted FAT, FAT32 or exFAT. I'm using an "Intenso 3500460 8GB Micro Line USB 2.0" and it works perfectly. 8 GB is more space than I will ever need. I prepared the drive on my laptop initially and created a (for me) sensible directorate hierarchy with separate folders for games (3000 approx), demos (dozens), my documents etc. I have the drive plugged in to USB port 0 (as annotated above).
Switching on and LEDs
Switching on the computer powers the device and the first thing you hear is the onboard speaker emit the sounds of a disk drive starting up, loudly! At first I wasn't sure I was going to like that and my instincts were to switch the sounds off but now, after several weeks of use, I'm glad I didn't - for more poetic reasons than you might imagine. More on that later. There are four LEDs along the top of the U2+L:
 |
| LED colors shown in this image are artificial and for illustrative purposes only |
If all is well, and the 1541 emulation (because at its heart, this is a 1541 drive emulator) is working, the bottom-left green LED (Drive Power) will be illuminated and we are good to go.
Documentation
At this stage it's worth stating that you do not get any printed documentation with your U2+L. There is an official
Quick Start Guide page which should be considered essential reading but as the name implies it does not cover everything and I found it helpful, but lacking. Gregorio Naçu over at c64os.com has written an
extensive review which also provides some helpful information, albeit for the older hardware, and older firmware. I also picked up a bunch of information from YouTube reviews. Below is an amalgamation of what I've learnt which is everything I need for now.
Navigation
Navigating the U2+L is simplicity itself, when you know which buttons to press:
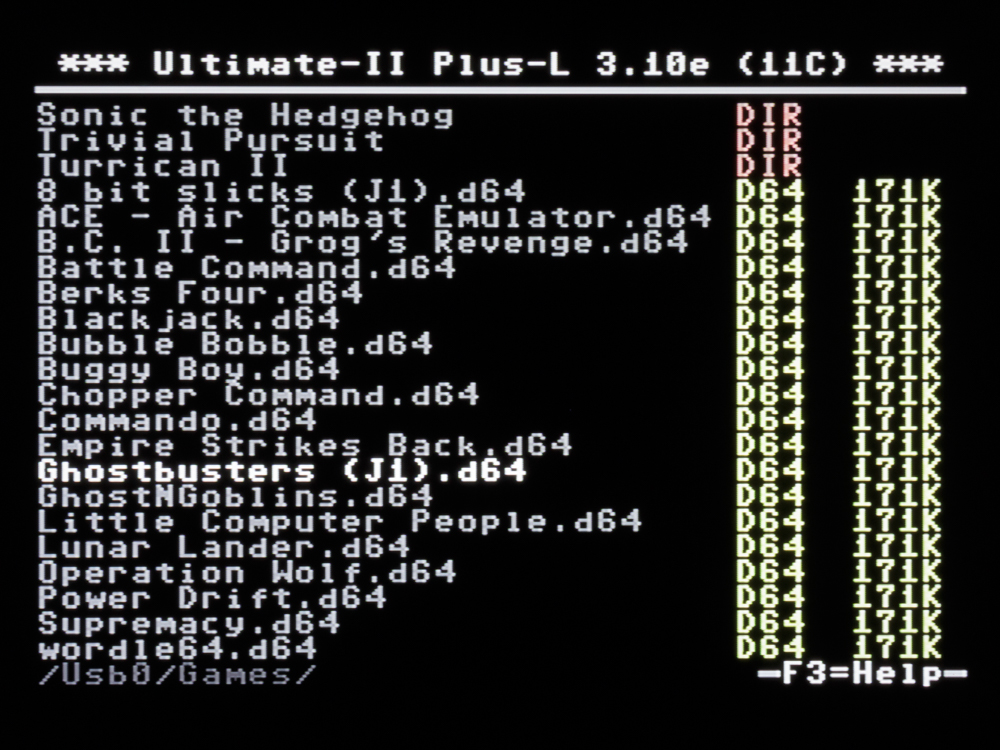
Pressing the middle button on the rear of the U2+L will freeze the C64 and open the main menu: (pressing that middle button again will unfreeze the C64 and return you back exactly to where you were).
 |
| Main menu |
Using the Cursor buttons on the keyboard we can navigate up and down and to open a directory you can either push Return, or simply press the right cursor button. That's the basic Navigation and it's a piece of cake. There are two other absolutely crucial keys you need to know about: [f2] and [f5] on the keyboard.
[f2] opens a Configuration menu. This is where you can activate/deactivate cartridges, setup printer emulation, enable the built in RAM Expansion Unit (REU) and change the U2+L's default screen colors should you desire, amongst a bunch of other things. Pressing RUN/STOP leaves the menu (and prompts a request to save changes)
 |
| f2 Configuration menu |
[f5] is an Actions menu, from where (surprise, surprise!) you can perform a bunch of actions. I'll touch on some of them later.
Finally, as far as buttons are concerned, the right-most button on the rear or the U2+L is a reset button. As you can see from the diagram above there is a Freeze button on the rear too, but I'm not such an advanced user that I need this, yet.
Installing a Cartridge
Before doing anything else I wanted to ensure an Epyx Fastload cartridge was being emulated. For better or worse this was the fastloader I was familiar with and as I didn't want to get into Kernal switching (prior to receiving the U2+L), it sufficed perfectly.
This process necessitates having a cartridge image. By default there are no cartridge images on the U2+L (I believe this differs from earlier incarnations where some were provided pre-installed but that is not the case now.) To remedy this you need to track down the "U64 Starter Pack" which is a zip file containing a bunch of the more popular cartridge files and Kernal ROMs most users will want. Once obtained, simply extract the files you need and move them onto the USB drive. Browse to the file, in the example below it's the "epyx.crt" I want. Press Return and a Context menu will open as shown:
Select "Copy to Flash". This will copy the file from the USB drive to the flash memory on the U2+L. Next we need to activate it so press [f2] and select "C64 and Cartridge Settings".
Then select Cartridge and press [Return]. In the Context menu you will see cartridge you copied to flash. Selecting this will ensure that the C64 behaves as though the cartridge is always plugged in which is what I want with my fastload cartridge. Simply return here and select "- none -" when you no longer want that behaviour.
If you just want to run a cartridge as a one off, simply browse to the cartridge image, press [Return] and from the Context menu select "Run Cart".
None of this is difficult. Installing replacement Kernal ROMs is exactly the same process as installing cartridge images (i.e. install on the internal flash, then activate) and I'll expand on that below.
Mounting D64s
Next, I obviously want to load a game. The process for this, once again, is intuitive and simple. Use the cursor keys to navigate through my directory structure until I arrive at the d64 image I want to load:
With the d64 I want to play selected, I now have two options:
- I can press [Return] - this will open a Context menu where I can command a number of actions to undertake with the disk, or
- I can press [cursor-right] and navigate into the disk where I can see all the files therein and pressing [Return] on one of them will open a Context menu where I can command a number of actions to undertake with the files.
Screen shots of both these options are below:
 |
| Context menu for Option 1 |
 |
| Context menu for Option 2 |
I can't hope to run through an exhaustive list of what each menu option does, but 9 times out of 10 I'm either using "mount disk" (which returns to the C64, mounts the disk and allows me to load and run in the normal way) or "run disk" (which resets the machine, disables the cartridge, mounts the disk and autoruns). Depending on whether I want to use the Epyx Fastload or not, will determine which option I use.
File Management
As described above, navigating the U2+L is simply a case of using the cursor keys to move up and down menu items, and in and out of directories and disk images. With a combination of key-presses and menu items, extensive file management is also possible: we can create or delete or rename directories, create or delete or rename disk images, and delete and rename program files, and we can copy and paste files. That's pretty much the full gamut of actions I'd want to undertake.
To create directories or disk images, use the cursor keys to browse to the location you want. Press [f5]. From the Action menu select "Create" then simply choose the action you want from the submenu:
NB: There is one entry not visible in the above graphic of the [f5] menu which can be found by scrolling down: "Directory".
Selecting one of these and pressing [Return] will create the desired file in your current location. Here's a breakdown of the available actions ([C=] is the Commodore key):
- To copy a file, select it then press the [C=] and [C] keys.
- To select multiple files, browse to the first file and press [Space], then browse to the next file and press [Space] and so on until all files are selected, then press the [C=] and [C] keys to copy. Multiple selections will display a diamond next to the file name.
- To paste a file, browse to the directory you want and press the [C=] and [V] keys.
- To delete a file, browse to it, press [Return] and from the context menu select "Delete".
- To rename a file, browse to it, press [Return] and from the context menu select "Rename".
RAM Expansion Unit (REU)
As advertised, the U2+L can emulate an REU (up to 16MB). To activate it, press [f2] to open the Configuration menu and select "C64 and Cartridge Settings":
Navigate down to "RAM Expansion Unit", press [Return] and select "Enabled" .
On the next line set the REU size by pressing [Return] and selecting from the list. Here I have selected 16 MB.
To test this, you may remember that I wrote an article "
Making Video for a Commodore 64". In there I described all the steps I took to create a short video clip capable of being played on the C64. Then I emulated it in Vice. Today I can play it on real hardware.
With the settings above applied. I now have to load my video clip (an .reu file) into the REU, then run the software to play back the video.
NB. The original Commodore REUs were cartridges. And as such when using the REU you should disable any currently enabled cartridge. So in my case I had to disable the Epyx Fastload. Once I've finished playing with the REU I can re-enable it.
First I browse to the .reu file I created and press [Return]. From the context menu, I select "Load into REU". This fills the REU with my video data in a few seconds.
Next I browse to the video player program (Koalavideo), press [Return] and from the Context menu select "Run Disk". When running the program will check the REU is installed and has the correct data loaded. If it does not you will get an error and you will have to recheck your settings - ensure other cartridges are disabled and check printer is disabled too. Otherwise the video should just run. Which it did, perfectly.
Should you wish to watch the video for yourself please feel free to grab this copy. NB - it's been made for the 6581 SID so if you have the newer 8580 it won't work:
You will also require a copy of Koalavideo to play the file and that can be
downloaded here.
So far so good. However, my experience with the 2021, REU specific game, Sonic the Hedgehog was not so perfect. Whether this is down to the U2+L or some other factor (e.g. modern SRAM replacement) I don't yet know.
Edit: with firmware 3.10j, the following settings in "C64 and Cartridge Settings" allow Sonic to run, consistently:
CPU Addr valid after PHI2: 80ns
CPU Addr valid after PHI1: 140ns
Kernal Shadow RAM: Enabled
PHI2 edge recovery: Enabled
What follows are the symptoms prior to making the above changes.
With cartridges disabled and REU enabled some attempts to load the game after selecting the option to enable fastload result in the load failing and computer locking up just as the "Loading. Please Wait..." screen appears. This happens maybe 20% of the time.
If I select compatible load, the load will work successfully 100% of the time, albeit very, very slowly. In either case the next part never works: the option to load the whole game into the REU. If I select this option everything will appear to load, and I'll be prompted to enter the second disk, which will also appear to load. Then the game will start but as soon as the first map attempts to load, the computer will lock up with a black screen. This happens 100% of the time.
The only way I can run this game is to NOT preload everything into the REU. Odd and annoying. If I don't preload, everything seems to work perfectly.
So. I know the REU works because KoalaVideo works just fine but something is messed up with Sonic. This could be any number of things. I assume it's hardware related but to determine what will take time.
Multi-Disk Programs
This feature is amongst the best. Often, with demos and games you will be prompted to insert a second, third or fourth disk to progress. One option is to press the middle button, manually select the next disk in the menu and mount it which seems to work. Preferably however, if your files are named sequentially, e.g. disk-00, disk-01, then when the program prompts for the next disk, if you simply hold the middle button for approx 1 second the U2+L will automatically mount the next disk for you. Bonus feature: while doing this the U2+L will also emit the swish and clicks of disks being removed and inserted into the drive which is a really nice touch, and positive affirmation that the process is working.
d71 and d81 Support
Though I've very little use for d71 and d81 disk images, both are fully supported as of firmware version 3.10.
Printing
Unbelievably, the U2+L can indeed emulate a printer. Four in fact. Now, the current firmware (3.10a) contains a bug which means Printing is not working correctly but the bug is known and will be fixed in a future firmware iteration. The bug means the U2+L crashes if we try to print something that exceeds 2 pages in length. So, for example, I'm unable to do a demonstration of a large program listing. But. There's a terrific wee program on page 22 of the MPS-801 User's Manual which is absolutely perfect for this. To save you mouse-clicks and unnecessary typing, you can simply download:
Before running you need to make sure the printer is enabled so in the configuration menu (press [f2]) lets get that sorted. The U2+L can emulate 4 different printers but I'll just be keeping it simple and using the default "Commodore MPS". My settings are in the image below. Note "Default Path" and "Printer Output File" - this terminology confused me initially but it soon dawned on me that "Default Path" is the directory you want to save your prints to, whilst "Printer Output File" is the path AND a filename prefix, so here my prints will be saved in the directory:
/Usb0/Printer
and will have the have the prefix "Page".
Now you can run the program. On the U2+L the top right green LED will begin to rapidly strobe - this is the sign that the printer emulation is working. When it stops strobing that's when you know the print is done. However, if you were to browse the print output folder now, nothing would be there. Huh? WTF? The answer amuses me and it's all a bit literal. If I had just printed this with a real printer what would be happening right about now? Well, the printer would have printed everything it should have, but we would have to physically attend the printer to feed the paper and remove the print. Believe it or not, because this print is less than one page long, that's the bit we now need to emulate so back in the U2+L menu press [f5], select "Printer" then "Flush/Eject" as shown:
Now the top-right green LED will illuminate solid green while the print output is prepared. When the LED goes off, then your print file will be ready.
By default, each printed page will be a 1984 × 2580 pixel, black and white PNG (Portable Network Graphic) file. You can then utilise this graphic however you like, for example, by cropping and embedding in a blog...
That just blows me away. If I didn't know better there's no way I'd know that wasn't a scan from a real printout. For further details there's a full guide to printing with the U2+L
here.
You can also elect to print files in 3 other formats: RAW, ASCII and PNG Color. Though you would be well advised to read the guidance linked in the paragraph above for more details.
After finishing your print runs you will want to disable the printer again via the Configuration menu (press [f2]). Some games and demos do not like sharing the bus with the printer and will give an error.
Networking
There is no Wifi capability in the U2+L, yet. I understand an ESP32 module will be made available at some point which can easily be inserted into the U2+L and which will resolve this but that's a ways off yet.
Edit from the future: on 7th June 2024 at 10:58 I took delivery of that long awaited wifi module. At 15:24 that same day, I was returning it to Gideon for a refund. There were two major problems with it that I wasn't prepared to live with. Problem One: there was a major cock-up with one of the resistors on the wifi module. Gideon had accidentally put the wrong value of resistor in and this meant it wouldn't accept it's required firmware. The proposed solution was to either return the board for a fix, or clip a different resistor off of the U2+L itself. Problem Two: the wifi module itself fouled on one of the light pipes for the case LEDs. This meant the case couldn't be closed. The proposed solution was to either force the case closed, thus bending the light pipe, or cut the light pipe short, rendering an LED useless. After about 2 seconds of reflection I realised I wasn't prepared to live with any of that, so back in it's box it went, and I shipped it back to the Netherlands. Many others have hacked at their U2+L to get it to work but I don't feel that module was fit for purpose. Gideon is a perfectionist and I'm surprised this is what came to pass. Perhaps there will be a redesign at some point, but until then, nope, not for me. Now, back to the original narrative...
Yeah not so fast there cowboy! Another edit from the future: so Gideon got in touch pretty damn fast saying he was happy to send a new module with resistor fix and a mechanical fix to solve the lightpipe fouling issue. I was more than happy to take Gideon up on this offer so I waited for that fixed module and that arrived on 1st July 2024. This revised build solved all the original issues and WiFi now works. What amazing service!
Until then, we have the ethernet port. Now you can use this to connect to Bulletin Board Service's (BBS) with the right (terminal) software but I have no interest in this for today. It wasn't something I ever used in the 80s and I've no nostalgia for it. It may be something I play about with in the future but so far I've not heard a compelling reason to bother. What I did want to be able to do, however, is completely eliminate the constant removal of the USB drive to transfer new files from my laptop or tablet back and forth. And we can do that, with ease, with FTP (File Transfer Protocol):
On the main menu (pictured near the start of of this article) you will see whether Net0 (the onboard network port) is connected or not. If there is no connection, the device's MAC (Media Access Control) address will be shown and the text will be in red. If there is a connection, the IP Address will be shown and the text will be in green. All very clear and nicely thought out.
Below are the steps I undertook and Windows 10 instructions. I don't have Windows 11, and I don't use Apple so have no idea how that would work (nor have I any desire to research such) but I'm sure there's a way.
First up I need to connect the U2+L to my home network. Sadly, there is no Wi-Fi for now, so we are stuck with an inconvenient (for me) network socket and a cable. Now I could connect this to some sort of Wi-Fi repeater which would be ideal but I don't currently have one. What I do have is a powerline network (i.e a network over the electricity cables in the house) and this works just fine.
After connecting to the network, and going into the U2+L Configuration menu (press [f2]) I saw DHCP (Dynamic Host Configuration Protocol) was on and an IP Address was assigned. Here's how this works: if DHCP is Enabled, then the static IP on the line below that is ignored (see picture below) and the router will assign it's own IP. If DHCP is Disabled then the static IP address shown below will be used.
I wanted a fixed IP Address so I assumed I would have to fix the IP Address in my router but (and I have no idea why) the U2+L doesn't show up as a connected device. However, with DHCP on, the router does correctly assign an IP. So, even though I can't see it in my router, it behaves as though it is there. If I fix the IP Address in my router assigned to the MAC number of the U2+L, even though it doesn't show up, the rule is obeyed and with DHCP on it picks up the fixed IP. I'm no expert in networking, clearly, but because everything works, regardless of visibility to the router I'm not minded to care.
We now need to connect to the U2+L via FTP (File Transfer Protocol) and in Windows 10 this is a cakewalk. There is no need to install any software, a wizard takes care of everything. Open "This PC" and right-click under "Network Locations". A menu will appear:
Select "Add a network location". The wizard will start. Simply follow the steps, entering the IP address and Location name you want to use when prompted:


Once finished a new network location with the name you specified in the wizard will appear and if you enter that you are free to navigate and browse your files as normal:
On my Android tablet I installed the "X-Plore" app and linking via FTP there was even easier. Literally as easy as entering the IP address of the U2+L. Job done. Link made.
Now I can simply browse and alter the files and directories as I please and not once does the USB drive have to be unplugged.
Replacement Kernals
Another advertised feature of the U2+L is its ability to override the C64's installed Kernal ROM with one you select. There is a small selection of replacement ROMs available in the starter pack referenced above, but I wanted to use JiffyDOS. Now, rather than go down the rabbit hole of discussing pirate software all I will say is that there are both legitimate and illegitimate ways of obtaining JiffyDOS.
This link is helpful.
I obtained the ROM images for both the Kernal and the emulated 1541 and installing and activating them was as simple as the process for installing and activating the Epyx Fastload cartridge (which I've now deactivated).
This works beautifully, and I have no need to worry about hardware switches which keeps things simple, neat and tidy. On the very rare occasions I use the Datasette I simply need to remember to deactivate JiffyDOS as it's not compatible with tape drives.
Closing Thoughts
I've only scratched the surface of what the U2+L is capable of. I haven't even looked at the SID emulation for example. What I have played with has kinda blown my mind and it's revolutionised the way I use my Commodore 64, making disk management a simple task and introducing features that I never thought possible.
At first I thought the emulated disk sounds would be an irritation and I was fully prepared to disable this but as I played around with my new toy, I realised the sounds added a whole new dimension to the computing experience. And now, a few weeks in, I wouldn't be without them. I think I get it. Allow me a moment of flowery prose:
If the SID chip represents the ears and tongue of the C64; If the VIC-II its eyes and the 6510 its brain, then the U2+L is its whirring and clicking heart.
It's rare indeed for some plastic and silicone to evoke any such thoughts, but what Gideon has built has so much elegance and accomplishment that it's very hard not to be utterly charmed by it. I doff my cap to you Sir. Well played indeed.
€130 is a lot of money, no doubt, but when considering everything the U2+L does, and all the other things I no longer have to buy to achieve the same result, I cannot help but conclude it's actually a bargain, assuming durability. My pi1541 is, as of now, relegated to my test C64 (where with my constant probing and tinkering I don't want to risk damaging the U2+L) and the only reason I can think where it will make a comeback is if the U2+L fails the durability test. Time will tell.
Total Cost Update
Yeah this expenditure is slowly getting out of hand. Luckily there are only a few components remaining to complete my all new C64 mission. However, until then I should still add the cost of the Ultimate II+ L to my total Commodore build expenditure which now stands at:
£1,108.92, or $1,460.87 or €1,308.73 approx.
 |
| "He spent how much?" |
Interested in reading more? In my next post I talk about some long awaited new hardware.