The last time I was in Berlin (bear with me, this is relevant), I had occasion to be sitting outside the Hauptbahnhof in Washingtonplatz enjoying a baguette in glorious sunshine. There were a bunch of beggars going around all the groups of other tourists who were also taking a moment in the sun. Eventually, a beggar ambled over to me and asked for money, in, as you would expect, German. Now, my German is not good; one might even venture to say it's non-existent. I am not proud of this but these are the facts. I apologised, and told the beggar I didn't speak German and he proceeded to relate the biggest bullshit hard-luck story you've ever heard in, well, in perfect English. And I do mean perfect English, and I do mean exceptional bullshit (a convoluted, far fetched epic). This put not only my lack of German to shame, but also my own spoken English. Sometimes I wonder what the hell I did actually learn in school. Very little of use to me now that's for sure. Anyway, if the beggar had had the decency to tell the truth I might have been tempted to part with a Euro or two, but I don't like to pay for bullshit, in any language.
So, let's get to the relevance of my embarrassing linguistic failings. I heard on the Commodore grapevine that there was a new product being spoken about, especially amongst German enthusiasts. The product was the WiC64 and the grapevine in question was forum64.de. And what I read there intrigued me. Intrigued me enough to translate every single relevant page in that forum a get to grips with this new beast of a board. Thank god for Google Translate which does a terrific job of making sense of even a fairly technical language such as this so that even this hopeless monoglot can fully understand the details.
So, what is the WiC64? Here's a translated quote directly from the manual:
"The Wireless interface for the Commodore 64 - aka WiC64 - is a parallel WLAN interface for Commodore computers with a user port connection. In contrast to the previously known "modems", the WiC64 works in parallel mode with 8 data lines, 2 handshake lines and a control line. This speeds up data transmission by a factor of 20: The WiC64 can load 202 blocks / 50kb from the Internet in 2.5 seconds – via HTTP:// or TCP connection.
It gives the computer full access to the Internet and the possible uses are almost unlimited. From simple applications such as synchronizing the time with an NTP time server via the Internet, loading data and programs from web servers or from PHP scripts to complex chat and message systems, everything is possible."
You gotta admit, this is intriguing right?
So, before we get into the meat and bones, a bit of history.
Details of the project were first published in October 2021. The developers are (with apologies if I have missed anyone):
- Hardy Ullendahl (aka: LazyJones) - Software (Database PHP, Chat Program)
- Henning Harperath (aka: YPS) - Software (Start Program)
- Sven Oliver Arke (aka: KiWi) - Software (ESP32, WiC64-Kernal and various tools for the C64, MicroMaze game) / Hardware (design)
- Thomas Moller (aka: GMP) - Hardware (layout creation and Implementation module and 3D printing)
- Retrofan - Graphic design.
The WiC64 project is open source which will allow future developers to expand on current functionality.
The whole idea seems to have been to take the complexity out of getting the C64 online by developing an entire ecosystem: the hardware and software (including an online portal) to make this as simple, and fast, as possible. This is not a traditional modem, and by clever use of multiple data lines, manages to achieve transfer rates far in excess of anything else currently available.
Theoretically, this means that that after initial set up, the user simply plugs the board in to the user port, switches on the machine, runs a single program and the computer will connect to an online portal where you can access chat rooms, games and access software to test your connection, amongst other things. The speed of the connection makes things like online multiplayer games, and real-time high score tables feasible. That, at least, is the Unique Selling Point. For the hardcore enthusiasts, this team have also developed a kernal which will allow you to access the internet without needing to launch the software but I will not be doing this.
The team have created a site at
www.wic64.de/ which is a repository of all the files you will need. Whilst the site itself is English, much of the documentation is in German but as I have said, this is no barrier and Google Translate will do a fine job of helping you understand everything.
Observation: Is a closed ecosystem a good idea long term? Who is hosting the server for example? What happens when (not if, but definitely when) they decide to stop hosting it?
Lets look at how this all comes together in practice. I bought the board on the 16th March 2022 from
restore-store.de for 32.67 EUR (approx. 27.31 GBP or 35.98 USD) including delivery to UK. I received dispatch notification and tracking number on the 20th March. I took delivery on the 26th March, 10 days after ordering.
In the box you will receive the main PCB, an OLED screen, an ESP32 board and the 24 pin user port connector.
Step 1.
First course of action was to bend the 24 pins of the user port connector closely together so that they could rest against the solder pads on both sides of the PCB. I simply did this with my fingers and bent them close enough so that they gripped the PCB; nothing difficult there.
Step 2.
Next step was to solder the connector to the PCB.
I found this a little tricky. Soldering on top of the PCB necessitates soldering between the tall plastic ESP32 connector and the plastic user port connector leaving very little room for error or risk melting the plastic. As always I just took my time though I would have made my life a lot easier if I hadn't knocked back a strong coffee 20 minutes beforehand resulting in slightly trembling fingers! The rear side was much easier. Tricky as this was, mission was accomplished with no solder bridges and no melted plastic. The connector was both very secure and correctly perpendicular to the board. Phew!
Observation 2. The need to solder is a barrier to entry for some potential customers. Many are not confident with a soldering iron. I guess this isn't aimed at the casual user which is strange given the apparent raison d'être of making online access easy. To me it felt a bit like an initiation.
Step 3.
Plug in the ESP32 board. The main PCB clearly indicates that the antenna of the ESP32 must be to the left. Anyone struggling with this part has no business being near the board!
The ESP32 is the brains of WiC64. It is a system-on-a-chip microcontroller with integrated Wi-Fi and comes preloaded with firmware which is great as this saves us the hassle of connecting this to a PC and installing firmware ourselves. There's some RAM and ROM built in and these are obviously being used for the firmware and to store router SSID and password details.
Step 4.
Finally (from a construction point of view) you must plug in the OLED. It's not as snug in its socket as I would like and with no other support it does tend to sag at the edge beside the ESP32. A pair of nylon risers (10mm) screwed into the holes at the base of the OLED might combat this.
Other than the soldering, everything else is a synch. I wanted a case for this and .stl files are provided at
WiC64.de so I used these to have one printed up. Details further down.
Connecting
With the build complete, let's see if this thing works. I plug it into the user port of my newly built SixtyClone for the first time and switch the C64 on.
Well this is very promising! That's a lot of LEDs and they all seem to be working. The guidebook advises that the LEDs mean the following, from top to bottom:
- Green: If on, the C64 is sending data to the ESP32. If off, the ESP32 is sending data to the C64.
- Yellow: 9V AC is present at the user port.
- Red: 5V DC is present for the ESP32.
- Blue: Same as the Green LED - if on the C64 is sending data, if off the ESP32 is sending.
- Red: ESP32 is being powered.
There are also four buttons, the functions of which are also described in the guidebook. The two large buttons on the right side of the main PCB are, from top to bottom:
- Function Button: the guidebook states "Pressing this for 5 seconds will disable the status LED" however in practise what this does on my version after a 5 second press is to invert the OLED display AND switch off the LED. I will not be using this.
- Reset: Will reset the C64.
And the two smaller buttons on the ESP32, again from top to bottom:
- Boot (ESP32): holding this for 5 seconds will deactivate the WiC64, holding it again will reactivate the WiC64.
- Reset (ESP32): will reset the ESP32.
With power present and with the C64 working perfectly we have no conflicts, so it's time to configure the Wi-Fi.
To do this we need to obtain some software, and again this is available from
wic64.de. At minimum you will need to download the file "WiC64 Portal Launcher". I also downloaded the zip file "WiC64 WLAN Config & Scan". The latter zip file contains two programs:
If you've read my page
here, you will know I use a pi1541 as virtual disk drive for my C64. The downloaded files above need to be transferred onto the SD card in the pi1541. Normally, to browse and access files on the SD card with the C64, I use the default file browser (fb.d64) and this works perfectly. For ease, I like to move the downloaded PRG files into d64 disk image files first though. I use
DirMaster for all my disk image needs.
I used the program WLAN Config to manually set up the WiC64 with my router details (SSID name and password) because I wanted to see my Wi-Fi password as I typed it and this program allows you to do that without obscuring the password with *** (WLAN Scanconfig would have worked too). I did this because my password is a combination of special characters, numbers and upper and lower case letters and whilst getting special characters is explained in the guide book, it wasn't crystal clear how to get upper case. It's actually perfectly simple - default is lower case and simply holding shift will give you upper case. Submitting this resulted in the WiC64 immediately obtaining an IP address from my router.
 |
| SSID obscured coz I don't trust you ;-) |
The details shown on the screen are easy to follow:
- Along the top of the screen is the assigned IP address.
- Next the SSID of the router you're connected to (obscured in this example)
- Next (-72) is my Wi-Fi signal strength in decibels per milliwatt (dBm). -30 would be the very best you can hope to achieve, my -72 is pretty mediocre but it will do.
- Next "config changed..." tells me I have just changed the configuration by updating SSID and password. These are stored in the ESP32 so setup is a one time only thing. The guidebook tells us that this line is "primarily only of interest to programmers", by which it means programmers developing software for the WiC64.
- Finally on the bottom three rows are creator credits and the date and time of the installed firmware
So far, so freaking good! Gotta say I was stoked to get this far without any show stopping issues. And with a WiFi connection established, it was now just a simple case of running the "WiC64 Portal Launcher".
For me the portal loaded very quickly - about two seconds. Clear and concise menus make this very simple to navigate with up, down and return keys and it definitely feels quick and responsive. Also it looks terrific, so much kudos must go to the designers! Very, very impressive.
The first thing i wanted to check was if I had the most recent firmware. I did:
The next thing I did was register. You will be asked to enter a username, password and email address and so, like all registrations of this nature, its prudent to know what username you'd like to use in advance. My registration was accepted and I was in. I'm not sure what happens if you enter a username already in use.
Separately, I received a confirmation email that my account was ready to use.
With full access to the portal I browsed through all the menu options and investigated some games and demos which load straight from the portal in seconds. It's honestly quite astonishing!
 |
| The lone chat room |
 |
| Submenu of the File Area |
 |
| Submenu of Internet |
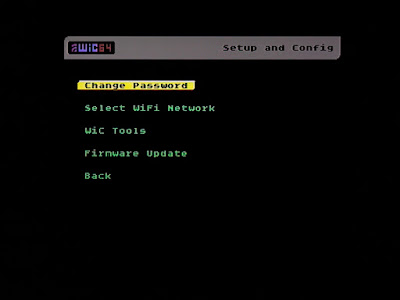 |
| Submenu of Setup and Config |
 |
| Decathalon loaded from "Online Games" |
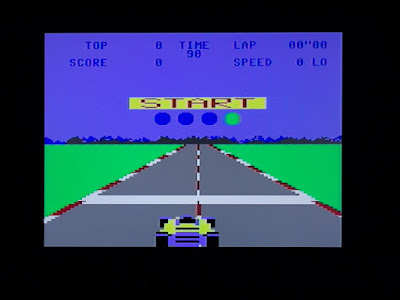 |
Pole Position loaded from "Online Games"
|
CSDb
I want to spend a moment talking about the CSDb Browser on the WiC64 because theoretically, this is a game changer. For those not familiar with CSDb, it is described as:
"CSDb (the Commodore 64 Scene Database) is an attempt to gather information about the Commodore 64 (C64) scene throughout time and store it in an easily accessible and heavily cross referenced database.
Here you can find information about the sceners, groups, releases (demos, intros, tools etc.) and events (parties) that have a connection to the C64 scene"
The CSDb Browser for the WiC64 was developed initially as a standalone program by Steve Ody (aka CSixx) and was subsequently incorporated into the WiC64 Portal in February '22 so as I write this is all very, very new.
On the WiC64, from the main menu select "Internet" and the first entry in the Internet sub-menu is "CSDb Browser". Select this. The Browser opens:
To determine the effectiveness of this browser, let's search for a game. Like the menu says, I press "S". This loads the search screen:
Here I press "Q" to enable a query, I type the name of the game I want to search for, in this case "ghostbusters". I press "Return" to commit the search term (as you can see that's not in the on screen instructions) then press "S" to start the search. Quite quickly the search results appear:
As you can see, I'm being presented with 25 results, six of which appear on this page, and the rest can be browsed by pressing the ">" button to go forward and "<" to go back. On these pages you just press the number corresponding to the result you want to load. In this case, pressing "1" for the first entry did not work; I will talk about that in a minute. However, pressing "2" did work so here's what should happen. First, the Release Info screen opens:
Here I press "R" to run the program. After a few moments it starts to load:
And a little later (after the obligatory crack screen):
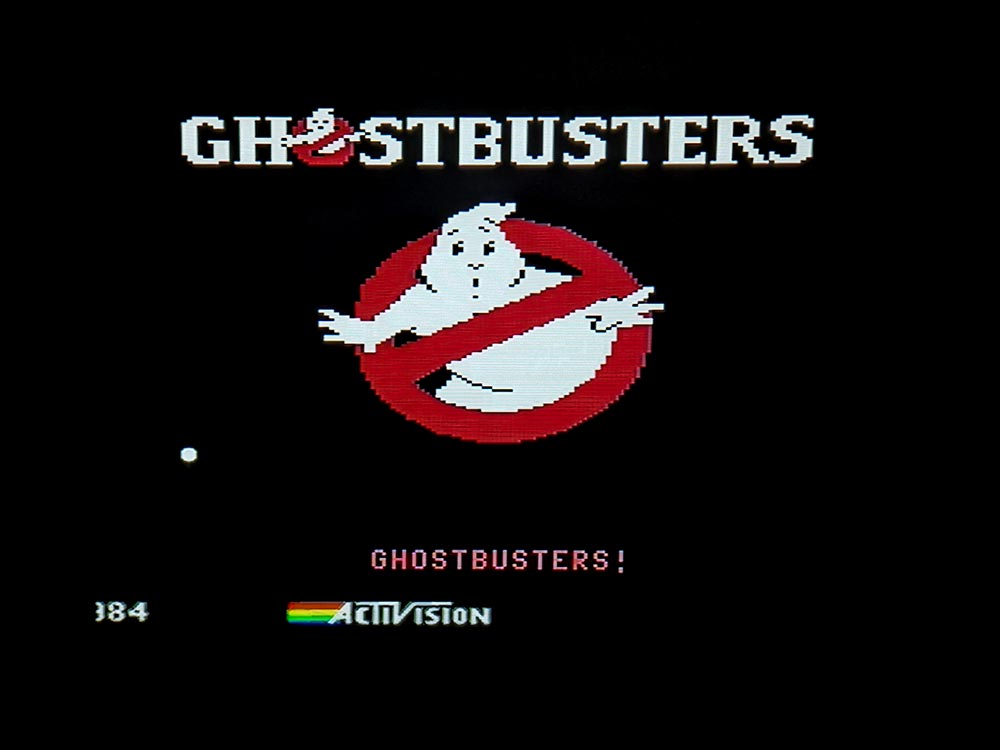
Success! The game loaded and played perfectly. The total time from pressing "R" to game being loaded was around 23 seconds (this includes getting passed the crack screen). This is a remarkable time. By comparison, loading the same game from my Pi1541 (and getting passed the crack screen) took 69 seconds (with Epyx Fast Load).
Now if this had been a repeatable exercise, I would have said this was a game-changing triumph, however this was the only game I could get to load. Of all the other 24 results found for Ghostbusters, not a single one would load. They either partially loaded then crashed, or simply timed out and the WiC64 returned to a frozen menu requiring a restart.
I tried this with other games too, "Commando", "Elite" and "Grog's Revenge" and whilst the Search function consistently worked perfectly, as did loading the Release Info, nothing else would load from there I'm afraid. At the moment it looks like I just got lucky finding one game which worked early in my experimenting.
Thinking perhaps there was a problem with my newly built 250466 SixtyClone, I repeated this exercise with my original 250407 breadbin and the results were identical. So yeah. Very disappointing. I could be persuaded one machine was glitchy, but not two, so I'm confident the problem is not at my end.
Browsing the database with my PC, I've had a dig around to see if I can see what might be going on.
As you can see from the screenshot above, searching the database for Ghostbusters again, I can see that there are actually 205 matches, but the first 25 shown here correspond with the 25 made available on the WiC64. Clicking each of these reveals that most of these links are ZIP files, including the second search result in the above list which is the same one I could get to work, so cleverly the WiC64 CSDb Browser is unzipping the files before loading them (I think).
I downloaded a bunch of these on my PC and opened them in Vice, and they all played perfectly so I'm at a loss as to why they aren't working with the WiC64. One works so why not the others? Gotta admit, that's disappointing as access to CSDb would make hundreds (thousands?) of games instantly and easily available. Based on my experience with two different machines however, it seems the CSDb Browser (version 1.4) is broken and a bit of digging around the website where you can download the stand alone program,
here, reveals the following quote:
"This is a work in progress and contains many bugs and virtually no error handling. Use at your own risk :)"
Obviously I'll be keeping an eye on this and doing more investigation.
3D Printed Case
As I mentioned above, I wanted to have a case for this to stop my grubby paws touching the electronics and give a degree of protection. I downloaded the .stl files provided at
WiC64.de and used a Powder Bed Fusion (PBF), Selective Laser Sintering (SLS) process with PA2200 Nylon which was then dyed black, naturally.
This was stupidly expensive, costing far more than the electronics, but the results were magnificent:
With the exception of the hole for the function button, seen in the last picture (above) at the top right of the case, the result was millimetre perfect. The two cut-out buttons at the bottom right of the cover plate perfectly align with the buttons on the ESP32 allowing these to be pressed. The function button hole was slightly misaligned and fouled the button which necessitated enlarging the hole ever so slightly. Five minutes work with a small file however, resolved this and the end result is as you see here. This is a screw-less design and simply clips together. It feels extremely robust and I am very happy with how it turned out which is just as well considering the £54 it cost (including VAT and shipping).
Unnecessary Finishing Touches :-)
It seemed to me this case design was crying out for LED light pipes to feed, or guide, the light from the LEDs on the board up through the holes on the left of the case fascia. As it stood the case seemed a bit lacking. To that end I bought a pack of Bivar, Panel Mount LED Light Pipes (part no: PLP2-10MM). These cost £6.68 for a pack of 10.
These are placed in the holes as shown:
As you can see, the result is quite nice but there are two issues which must be overcome:
- The 2.8mm width of the pipe is a little too small for the holes. If I want these placed permanently they need to be glued in.
- Despite the pipes being directly above each LED, there is a lot of light bleed from the green LED into the amber LED pipe which swamps the amber light from all but a top down viewing angle. The solution here is to mask the sides of the green LED. I used tiny lengths of 2mm diameter heat shrink tubing which when squeezed over the LED was already tight and so, crucially, this didn't require any heat shrinking which would be ill advised.
 |
| Masking the LEDs minimises light bleed |
The observant amongst you will notice from my pictures above that the serial number printed on the blue plastic of the port connector is present in some pictures but not others. I decided, after soldering naturally, I didn't like having the number visible like this. Desoldering and reversing the connector was not an option so I simply sanded the number off, starting with 240 grit and worked my way through finer and finer grades, finishing with 5000 which is essentially a polish. It was stubborn but eventually this worked nicely.
Is all of this ludicrously excessive and wholly unnecessary? Yes.
However, let's get back to my thoughts on the WiC64 itself...
Summing Up
The above review, and the conclusions below were originally written in April 2022. Everything there still holds true but despite my general positivity then, a year on, it's worth interjecting now (May 2023) to advise that I very rarely bother to use the WiC64. In practice I've found there haven't been enough improvements or additions in the portal to make it worth my while. I don't have anyone to play multiplayer games with, so thats useless to me. The games which are there I can obtain separately and run from my pi1541 or Ultimate II+ L. A new message board is a very nice touch but, because users are predominantly German, the conversation remains, naturally, in German which is tedious to translate manually (I have to re-type any messages I want to understand into Google Translate) so I just don't bother. Now, these are my problems and nothing whatsoever to do with the developers or other users who have their own priorities but it seems unfair to wax lyrical about how great something is when, in practice, I just don't use it. That said, my original impressions are retained below though I've updated my rating and some comments to reflect things as I find them now:
My impressions of the portal, thus far, are largely positive but not without critical points to make:
- There is a general lack of continuity when it comes to returning to the portal menu after opening a game, demo or other file. Sometimes pressing the left arrow key will do it, sometimes run/stop restore will do it, sometimes nothing works and you need to reset. I don't mind there being different methods, but I do wish it was made clear which to employ for each file. Indeed a general "navigation" hints and tips page would be ideal.
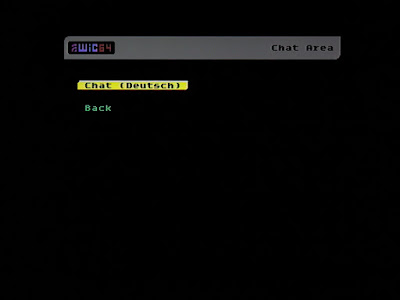
- The lone chat room is clearly marked "Deutsch" which I'm not complaining about but, selfishly, and given my firmly established monolingual status, I do wish there was an English one too. Likewise with the message board.
- This is silly but I've played a few games from the "Online Games" menu and most required the joystick to be in port 1 which is never normally my default. Would be nice for the intro screen to advise of this (could say that about every game to be fair). It raised my eyebrow to see these games have been specifically remastered for use with the WiC64 so I am certainly not underestimating the enormity of the work going into this.
- As explained, the CSDb Browser (v1.4) has proven to be disappointing.
- Not wishing to detract at all from the magnificent achievement this is (and it categorically is), it does feel very sparse at the moment. I really hope, as it becomes more popular, more games, more chat rooms and more services become available.
There is so much obvious potential here I have no doubts some great plans are on the drawing board and I will be watching with great interest over the next few years. I'd love, for example, to see a
teletext style news feed with articles on forthcoming updates and other C64 developments and a messaging system where other users can contact you privately.
Steve Ody (CSixx), has also created
Google Maps for the WiC64 which actually frickin works (albeit with some chunky graphics making it just a bit of fun, but as a proof of concept, it's simply brilliant) so the possibilities are virtually endless. However, whether anyone chooses to capitalise on these possibilities remains to be seen.
 |
| Google Maps on the Commodore 64. Whodathunkit? |
So, time to rate my experience thus far:
For the hardware this is an easy 9/10. I'm only knocking a point off coz I hated the awkward soldering.
For the Portal I'd say 10/10 for presentation, 9/10 for navigation (point off for inconsistent return to menu methodology) and a lowly 2/10 for content (as stated in my latest thoughts above, in practice, after a year, I've found nothing to keep me coming back).
I maintain it is a remarkable achievement and a very nice piece of hardware that could add immense value to the C64 but which, for me, doesn't yet hit the mark. I hope I've demonstrated that language is certainly no barrier to getting up and running, though, as an ignorant monoglot, it certainly is a barrier when using the chatroom and message board, there's no getting away from that.
In my
next post, I decide to really stretch myself and see if it's possible for a total novice and electronics imbecile (me) to design my own RF Modulator replacement PCB for my new Sixty Clone.
Total Cost Update
Total expenditure for the WiC64 + 3D Printed Case + Light Pipes was as follows:
£27.31 + £54 + £6.68 = £87.99 ($107.03 or €100.37)
Adding this to my current running total gives new Commodore related total expenditure of:
£908.29, or $1,211.25 or €1,076.93